
How to add extra storage on your Steam Deck and Dock
Looking to add extra storage to your Steam Deck? Don’t worry. This guide helps you how you can increase storage on your favorite gaming console within a few minutes
The Steam Deck is one of the most impressive portable gaming consoles you can get right now. It has enough firepower under the hood to run any AAA game without feeling any stress.
However, we only wished that it came with more storage options. Since storage is such a premium from Valve, we’re forced to look for ways to add extra storage on the Steam Deck.
But, before you bust out your tools, the process isn’t quite as straightforward as you might think. You can always pop in a MicroSD card to add extra storage. Alternatively, you can use external drives as well.
These are the simplest ways to expand the storage so that you can download more games but the combination of Linux and Proton makes things tricky. We explain all below.
How to format your external drive for Steam Deck
The first thing you’ll notice, whether you’re using the official Dock, or a third-party option, is that inside the game mode’s storage options, there will be nothing showing up. This is because the drive you’ve just brought over needs to be formatted for Linux.
Unfortunately, this means you’ll be sacrificing the drive to SteamOS, binding it to Linux until you reformat it again. There are programs like Ext2Read to see these on Windows, and on macOS, you’ll need to use Mac Fuse to see the files, but unless you like extra leg work, just get a specific drive for your Steam Deck.
We’re not sure if this will work on the JSAUX M.2 Dock’s ‘internal drive’, but it should work with any USB external drive.
Set a Steam Deck password and enter desktop mode
Before anything though, if you’ve never been through to desktop mode, or been prompted to set a password while in desktop mode, we should do that.
To get to desktop mode, press the Steam button (use the mouse to press the virtual Steam button in the corner or guide button on your controller if you’re connected up to a dock) and then Power. It should give you the option to head into desktop mode.
From here, go into the taskbar and search for Konsole. This will bring up a terminal, where we can set the password for the first time.
Obviously, if you’ve already done this, skip this step.
If you haven’t got a keyboard connected, we’d recommend you do so, but if it’s not an option, press Steam+X to bring up the virtual keyboard.
In the terminal, type: passwd and you’ll be prompted to change the password.
Partition the Steam Deck external drive: KDE Partition Manager

After that’s done, head back into the taskbar search and find KDE Partition Manager. This is where you’ll be formatting your drive into the right format.
If you have a large drive and still want it to be accessed on other operating systems, you’ll be able to partition it out here. For example, if you go with a 1TB drive and still want half to be saved for Windows, right-click the partition and choose Resize/Move from the context menu. Then type in how much space you want the Windows side to be. Think of it like making two, or more drives out of one.
To make any changes to the drive, we’ll need to make sure it’s unmounted first. Once you’ve tapped your password into the partition manager, click ‘Partition’ after highlighting your chosen drive. From this drop-down menu, hit Unmount. You can now make changes.
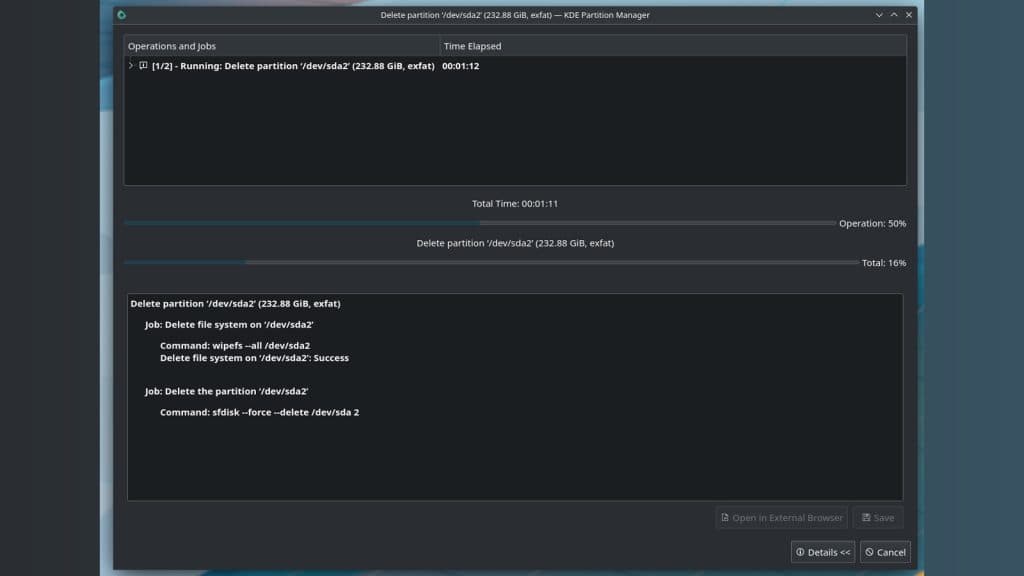
If the drive was already in use elsewhere and is still prepped for other systems, right-click and press delete on the partition. This will prep KDE to treat it as a fresh drive when we hit apply.
No changes will take effect until you hit apply, so if you decide to back out, just hit undo or close KDE before proceeding.
Set to ext4
On your blank partition, right-click and press ‘New’. This will bring up another menu and we want to choose ext4.
Ext4 is essentially the needed drive format. Like on Windows, with FAT32, or macOS with its Extended Journal, this is the needed way to get SteamOS to recognize it as a place to install games once we head back to Game Mode.
If you have no intention of using the game mode to play the games you install here, exFAT will handle everything. This could be for those who want to emulate or play games of this drive between Windows and SteamOS.
However, not using ext4 will mean that game mode won’t find the drive and treat it properly.
Give the drive a name and press OK. Once you’ve double-checked that everything is correct, press Apply in the top left-hand corner. This will begin the process of formatting and setting up the drive for SteamOS.
Mount the drive and change owner permissions
On the taskbar, you’ll see a small USB icon. Press this, and mount the drive with the button that pops up. We can now move on, slightly.
Subscribe to our newsletter for the latest updates on Esports, Gaming and more.
A stumbling block that can happen when formatting a drive on Linux, is that the permissions change. As of right now, we, the user, have access to it in desktop mode, but Steam doesn’t. Even if we were to set it as a place to install games, there’d be no way for the OS to alter it.
Going into the file manager and looking at its properties will reveal that the drive is ‘owned’ by root and not ‘deck’. To change this, go back into the terminal and closely follow along, as altering the following incorrectly, could lead to instability issues.
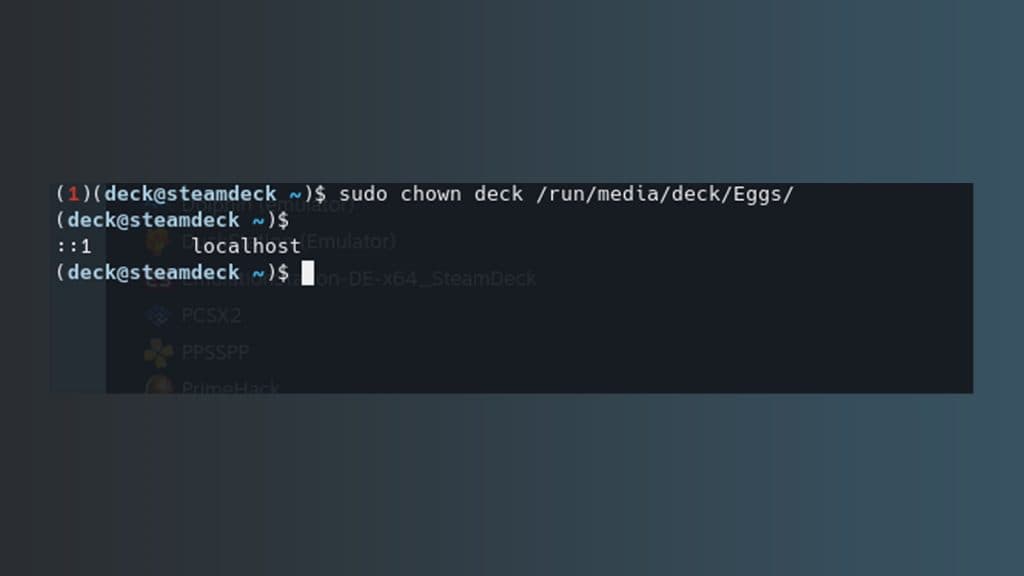
In terminal, type:
sudo chown deck /run/media/deck/[drive name]
Sudo is effectively a skeleton key for administrators on Linux, allowing us to bypass any layers of security and make the needed changes. It’ll still ask for a password, so just type in the one you’ve got set.
Once you hit enter, the permissions and ownership will have changed to ‘deck’. Now we can inch a little closer to the finish line.
How to create a Steam Library on an external drive for your Steam Deck

Now, open Steam, and at the top, press Steam, then Settings. In the Downloads section, choose Steam Library Folders, and if all went correctly when you hit the plus sign to add a new drive, your new drive should be on the list.
This will create a Steam Library folder, and we’ve just got one small step left.
The main issue with external drives and the Steam Deck is that they don’t mount automatically. In our testing of the Steam Deck Dock, we found that even putting the system to sleep for too long would cause the drive to become disconnected, forcing a trip to desktop mode to get it back again.
How to auto-mount external drive on Steam Deck and Linux
To avoid having to mount the drive each time, we can edit the configuration file of the Steam Deck to recognize it upon loading, regardless of where we load into.
Back in the terminal, type the following:
sudo nano /etc/fstab
This will bring up the terminal text editor and the needed config file we need to alter. You can right-click and paste most of this, but we do recommend you use a keyboard for this.
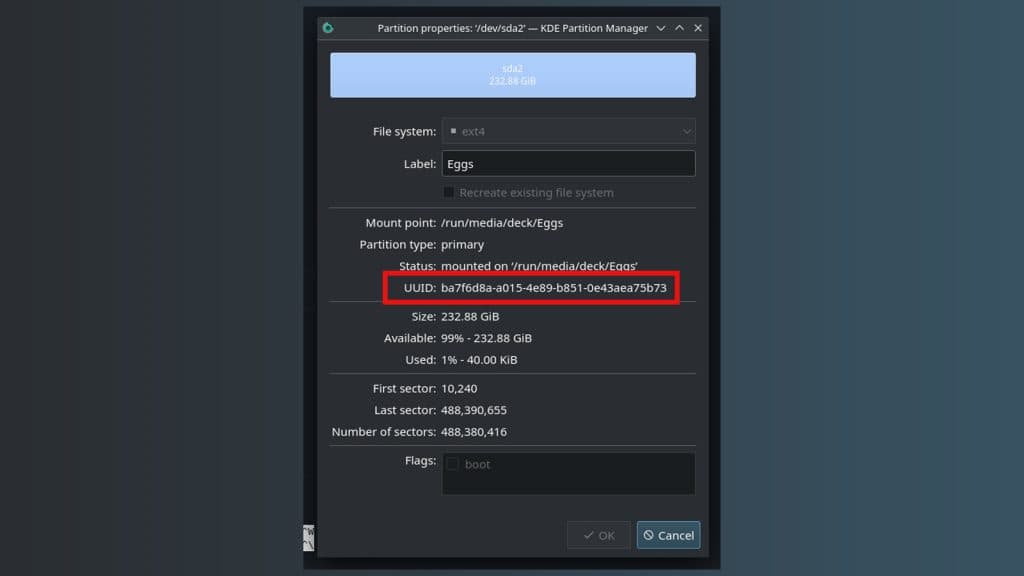
There’s going to be a list of drives and instructions for them. We’ll also need the UUID number for the drive, so head back into KDE Partition Manager, choose your new partition, right-click, and enter Properties. Copy-paste your UUID or take note of it and go back to the Terminal.
Tap your down arrow to get to the bottom of the list, and type the following:
UUID=[insert your UUID here] /run/media/deck/[drive name] ext4 defaults,nofail 0 0
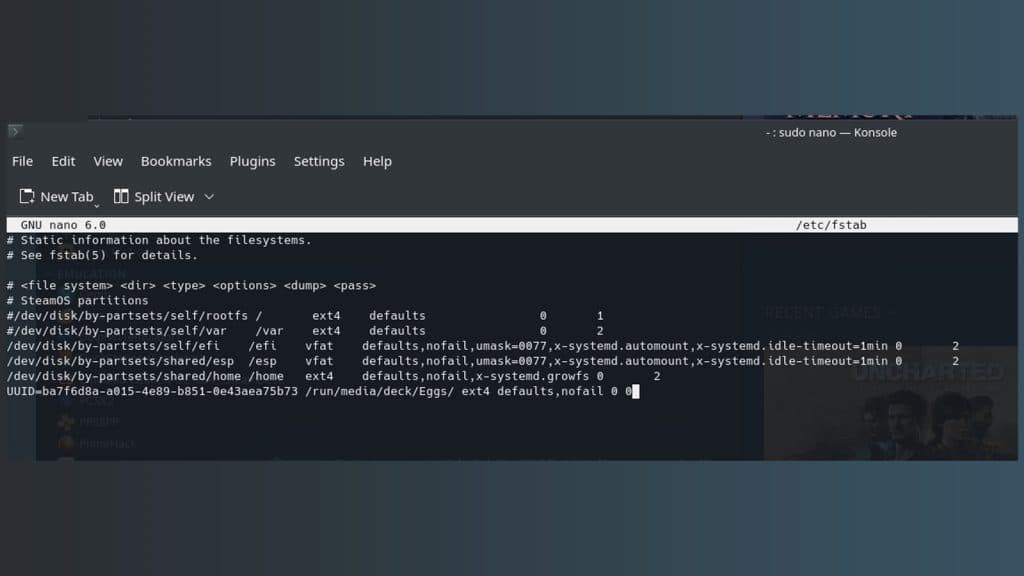
The ‘nofail’ part at the end is absolutely required. If you don’t include this in your changes, the Steam Deck will not boot without the drive connected. This added bit of instruction will let you operate the Steam Deck as normal when out and about.
It is also important you ensure that capitals, dashes, and anything are correct, or it will fail to boot. We called ours ‘eggs’, but Linux adds a capital letter. Double-check how Linux has formatted it in your file manager and type it in exactly the same way.
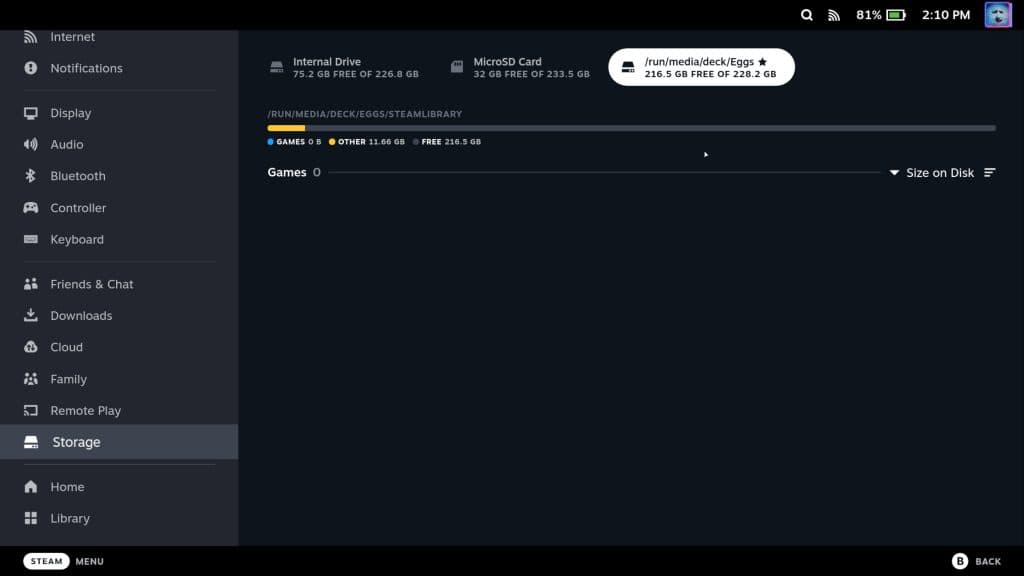
Reboot your console and in game mode, go to your settings and storage options. The drive should now appear at the top alongside the internal and SD card. You can set it as the priority drive, but there’s no way to choose where to install it unless you go to desktop mode and back into game mode.
Don’t remove the drive while on
Removing the drive, and plugging it back in, or removing the Steam Deck from its Dock, will mean you’ll need to plug it back in before you reboot. For whatever reason, while auto-mounting the drive is easy, actually getting to auto-mount while the system is still on is a hassle. Hopefully, this will be fixed in a future update.
Be sure to check out our guides on how to play Epic, GoG, Amazon, and Xbox Game Pass games on the Steam Deck.