
How to enable TPM 2.0 for Windows 11
Wondering how to enable TPM 2.0 for Windows 11? We’ve got you. TPM is an unfamiliar term for most Windows users, but if it’s causing you a headache, we’ve got you covered with how to enable, or get around it.
TPM 2.0, or Trusted Platform Module 2.0, is essentially a security chip found on your computer’s motherboard and handles things like encrypting your biometric data, fingerprint information, and more.
Since Microsoft is looking for ways to move away from traditional passwords, the TPM 2.0 module has become a critical feature on all new Windows-powered computers. Unfortunately, for a few, TPM is also why they can’t get Windows 11 on their device.
However, do not worry. There are workarounds to help you with the TPM 2.0 – Windows 11 issue. Here’s how to enable TPM 2.0 for Windows 11.
How to check if TPM 2.0 is enabled
In Windows
To quickly check if your TPM is enabled, you can hit Windows+R to open Run. From here, type tpm.msc.
Windows should give you a clear message to say whether or not it is activated, but if it isn’t, we’ll need to go into your motherboard’s BIOS.
It could be that the TPM on your motherboard isn’t activated, but if it doesn’t appear in the BIOS, you’ll have to venture into the other methods.
In the BIOS
Turn your PC off and as it boots back up, press either of the following to enter the BIOS. Your PC should let you know in the thick white text along the bottom, but if not, you can always Google your brand.
The usual culprits are F2, F8, F11, F12, or DEL.
If these aren’t working for you, you can always enter the BIOS by heading into settings. Then follow these steps:
- Open Settings
- Go into Update & Security
- Press Recovery, scroll down to Advanced Startup, and choose Restart now
- You’ll end up on a blue screen, so hit Troubleshoot.
- In the next menu, it’s Advanced options
- Then UEFI Firmware Settings, which will ask you to restart and you can now enter the BIOS
From here, we need to find your settings. Oftentimes, each brand will keep them under Settings, or advanced settings. The two you need to watch for are dependent on your brand of CPU.
For Intel it’s PTT and for AMD it’s FTPM.
Subscribe to our newsletter for the latest updates on Esports, Gaming and more.
Next to it, it should allow you to change it to enabled. If there’s nothing there or you can’t, you don’t have a TPM on your motherboard. Ideally, you’d upgrade. However, dropping that kind of cash to install Windows 11 is a bit of a joke.
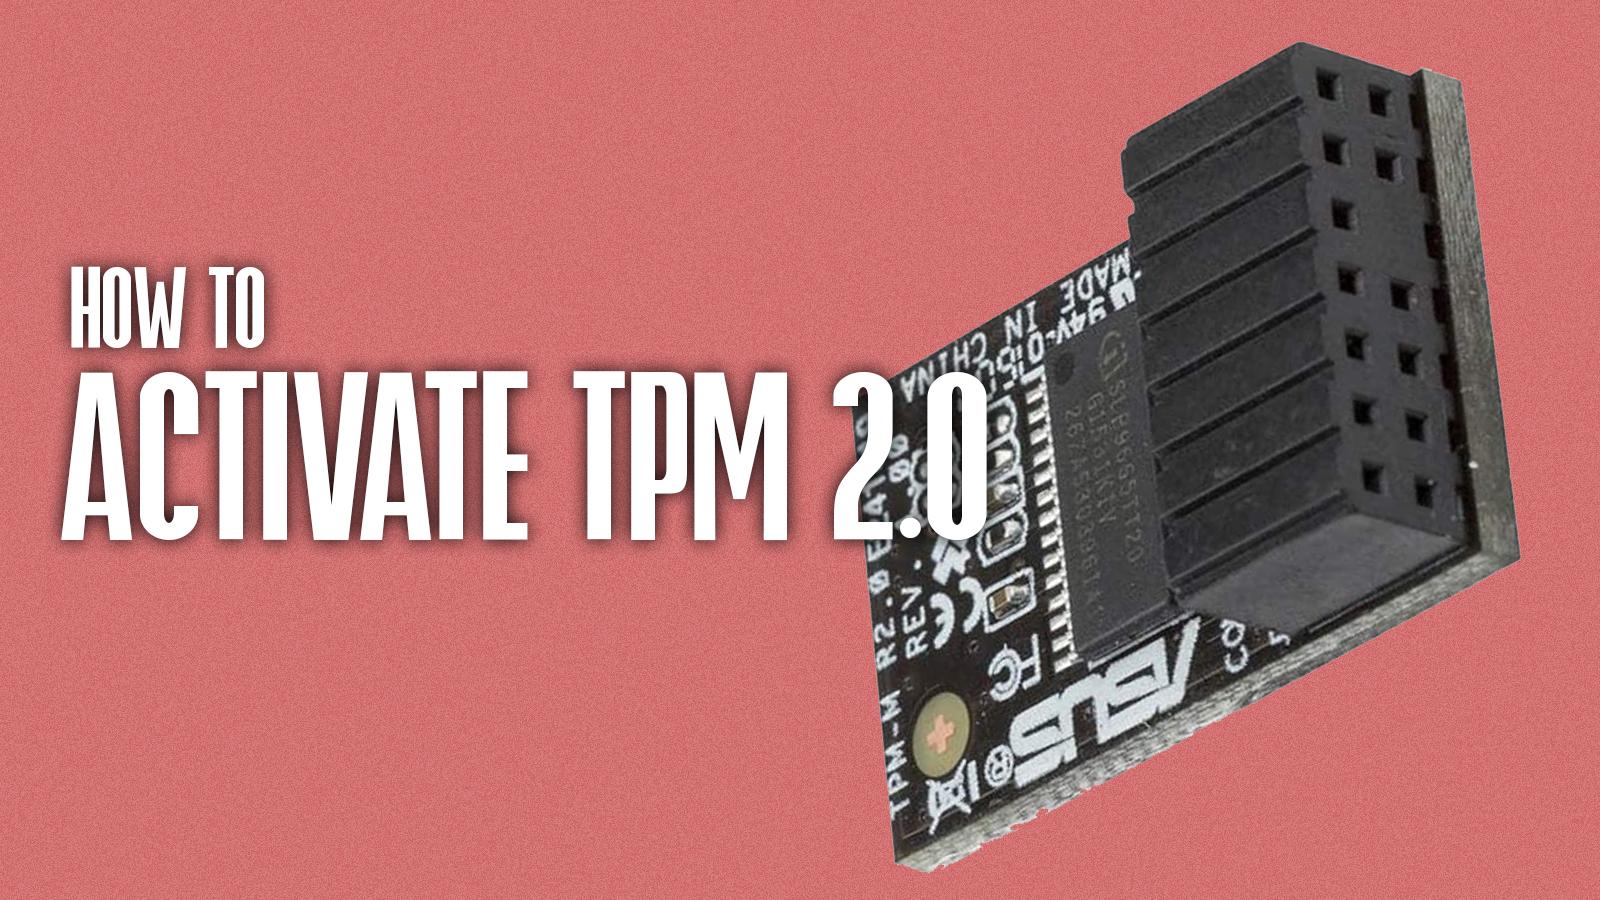
Instead, we can manually install one by grabbing a TPM from the following stores:
These two seem fairly generic in branding, so you could find success with these:
You will then need to follow your individual motherboard instructions on where to install it on the board. It should be a row of free pins on the board, but be sure to double-check your manufacturer’s instructions.
You will also need to enable Secure Boot, which will be under the Boot or Settings options.
Save and exit, then boot up. You should now be able to upgrade to Windows 11.
No TPM on Windows 11
If you want to install Windows 11 on a system without a TPM, you could use Rufus. Rufus is a bootloader creation kit, that’s incredibly easy to use. Once you’ve acquired your ISO file from the official Microsoft website, you can choose from one of the drop-down lists whether you want to use TPM and Secure Boot. It’ll overwrite some files to help you get around this restriction.
While it’s a guide for installing Windows on the Steam Deck, we have full instructions for Rufus in that guide.
Also, make sure to check out our other guides:
How to clean mouse pad | How to set up dual monitors on Windows 10 & 11 | How to turn on Bluetooth on Windows | How to check your graphics card | How to record your screen on Windows & Mac | How to check your PC specs | How to fix monitor not detected on PC | How to connect phone to TV